






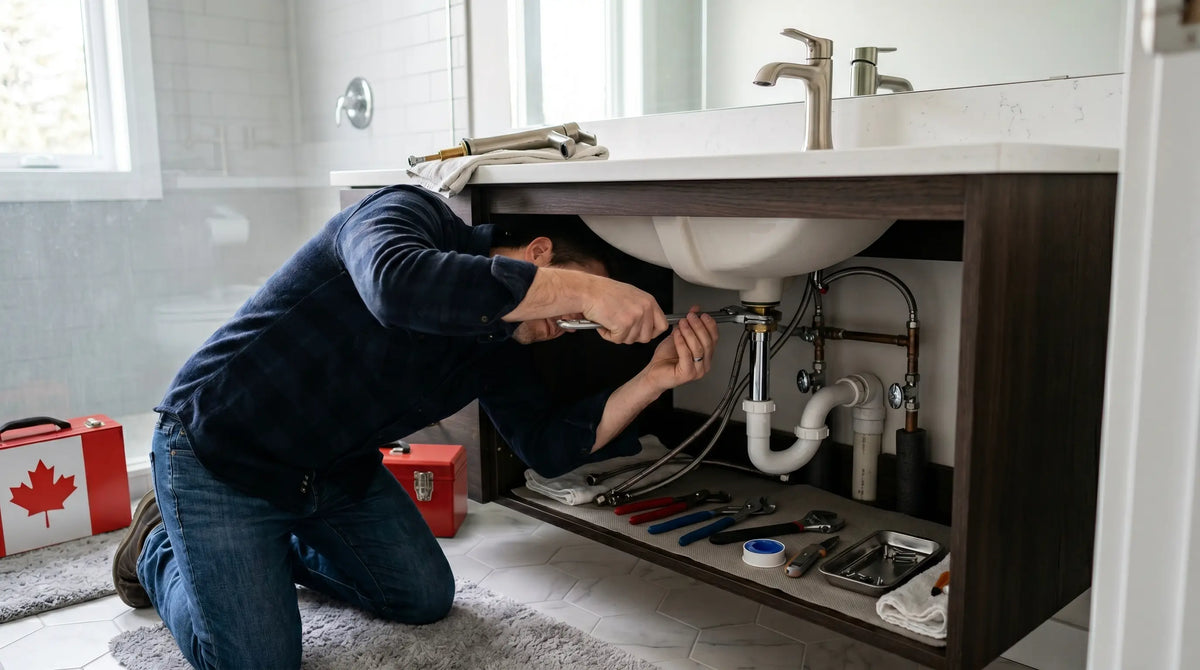
Replacing a bathroom faucet is one of the most accessible plumbing jobs a Canadian homeowner can tackle without a plumber - provided you have the right tools, understand the shut-off valve locations, and know which steps require patience rather than force. This guide walks you through the complete process from start to finish.
A bathroom faucet replacement is the single most common plumbing job Canadian homeowners successfully handle themselves - and with good reason. Unlike drain repairs, supply line rough-in, or valve replacement behind the wall, a faucet swap involves only the fixture itself and the flexible supply lines connecting it to the existing shut-off valves under the sink. There is no soldering, no wall access, and no requirement for a building permit in any Canadian province. The job requires patience (particularly when removing an old faucet that has been in place for a decade or more), the right tool (a basin wrench is non-negotiable), and a careful approach to one specific step: making sure the water is fully off before disconnecting anything.
This guide covers the complete process for the most common Canadian bathroom faucet configuration - a centerset or single-hole faucet on a vanity with a built-in overflow drain. It also notes where widespread faucets diverge from the standard process, and identifies the specific points where calling a licensed plumber is the correct decision regardless of your comfort level with DIY work.
Replacing a faucet on an existing vanity with functional shut-off valves and flexible supply lines is a DIY job for most Canadian homeowners with basic mechanical confidence. It becomes a job for a licensed plumber when: the shut-off valves under the sink are seized or corroded and cannot be turned, the supply lines are old copper pipe soldered directly to the valve with no flexible connector, the drain rough-in needs to be changed to accommodate a different faucet hole configuration, or there is evidence of water damage or mould under the vanity that suggests a previous leak. If any of these conditions exist when you open the cabinet under your sink, stop and call a plumber - the faucet replacement itself is not the problem, but the underlying plumbing condition is.
The most common reason a faucet replacement takes four hours instead of one is discovering mid-job that a required tool is missing. Lay out everything below before turning off the water.
The most common and most avoidable mistake in a faucet replacement is purchasing the wrong configuration for the sink. Canadian bathroom vanity sinks come with one, two, or three pre-drilled holes, and the faucet you purchase must match the number and spacing of those holes. Buying a widespread faucet for a single-hole sink - or a centerset for a three-hole wide-spaced sink - means returning the faucet and starting again. Take these three measurements before you order anything.
| What to Measure | How to Measure It | Why It Matters |
|---|---|---|
| Number of holes in the sink deck | Count the pre-drilled holes - including any covered by the existing faucet's deck plate or covered with a plug/button | Determines faucet configuration: 1-hole (single-hole or centerset with deck plate), 3-hole (centerset or widespread) |
| Hole diameter | Measure the diameter of the primary faucet hole - standard Canadian bathroom sink hole is 35mm (1-3⁄8"). Confirm before ordering if the faucet spec lists a different requirement | Most faucets fit standard 35mm holes, but some European-specification faucets require 32mm or 38mm - confirm before purchasing |
| Centre-to-centre hole spacing (3-hole sinks) | Measure from the centre of the left hole to the centre of the right hole. Standard centerset spacing is 4" (102mm). Widespread sinks are 6"-16" apart. | A centerset faucet (4" spread) will not bridge a 12" widespread sink hole pattern - the mounting posts will not reach the outer holes |
Follow these steps in order. Do not skip ahead - particularly the water shut-off and the leak test at the end. Each step builds on the one before it, and reversing course mid-process (to grab a forgotten tool, or to go buy a basin wrench) risks leaving the water off to the bathroom for an extended period.

Empty the cabinet under the sink completely - remove everything stored inside. You will be working in this space for 30-60 minutes and need unobstructed access. Lay down old towels on the cabinet floor to catch water drips.
Locate the two shut-off valves under the sink - one for hot water (typically on the left) and one for cold (typically on the right). Turn each valve clockwise until it stops. If the valves are quarter-turn ball valves, the handle should be perpendicular to the pipe when closed. If they are multi-turn valves (older style, requires several full rotations), turn until firmly closed - do not over-tighten.
Turn on the faucet above the sink and let it run until water stops flowing. This confirms the shut-off valves have closed fully and drains any residual pressure from the supply lines. If water continues to flow steadily after 30 seconds with the valves closed, the shut-off valves are not sealing fully - stop the job and call a plumber to replace the valves before proceeding.

Place your small bucket directly under the supply line connections at the faucet inlet tubes. Position your adjustable wrench on the supply line nut where it connects to the shut-off valve - hold the valve body steady with one hand to prevent it from rotating as you loosen the nut. Turn counter-clockwise to loosen. Once the nut is free, pull the supply line down and let the residual water drain into the bucket.
Repeat for both supply lines. If the supply lines are old braided stainless lines with plastic nuts, they will typically loosen by hand once the wrench breaks the initial seal. If they are old chrome rigid supply tubes, they may be corroded - apply penetrating oil and allow 10 minutes before trying again. Do not use excessive force on chrome rigid tubes; they can crack at the olive fitting inside the valve.
If you are replacing the supply lines at the same time as the faucet (which is strongly recommended), disconnect the old lines at both ends - at the shut-off valve and at the faucet inlet. Set them aside and discard. Your new braided supply lines will connect between the new faucet and the existing shut-off valves. Confirm the length before purchasing - measure from the shut-off valve connection to approximately 30cm above the sink deck to estimate the correct line length. Standard vanity supply lines are 30cm (12"), 45cm (18"), or 60cm (24").

Most bathroom faucets include a drain pop-up assembly - the small lift rod on the back of the faucet that opens and closes the drain stopper when pulled up or pushed down. This rod connects via a clevis strap and pivot rod to the drain body under the sink. You need to disconnect this linkage before the faucet can be removed.
Look under the sink at the drain pipe. You will see a horizontal pivot rod entering the drain body from the side, connected to a vertical clevis strap by a spring clip. Squeeze the spring clip and slide the clevis strap off the pivot rod. Pull the pivot rod free from the drain body - it will have a small ball at the end that was sealing inside the drain. Set the pivot rod and clevis strap aside, as they will be reused if the new faucet uses the same drain assembly, or discarded if the new faucet includes a complete new drain kit (most do).
Pull the lift rod up and out through the hole in the faucet body - it simply pulls free once the clevis strap is disconnected. The drain stopper itself can now be lifted out of the drain basket by hand from above the sink.
This is the step where the basin wrench earns its place in your toolkit. The faucet is held to the sink deck by mounting nuts threaded onto the inlet tubes from below the sink - in a space between the bottom of the sink bowl and the top of the cabinet floor that a standard wrench cannot access.
Lie on your back with your head inside the cabinet, using your headlamp to illuminate the underside of the sink. Locate the mounting nuts - there will be one per faucet hole (typically one nut for a single-hole faucet, two for a centerset). Apply penetrating oil to the nuts and wait at least 10 minutes if the faucet is more than five years old.
Position the basin wrench jaw around the mounting nut with the jaw facing counter-clockwise (for removal). The long handle of the basin wrench extends down toward you, giving leverage in the confined space. Turn counter-clockwise to loosen each nut. Faucets that have been in place for a long time may require significant effort - this is the step where patience matters more than force. If the nut will not break free, apply more penetrating oil, wait another 10 minutes, and try again rather than forcing it.
Once both mounting nuts are removed, the faucet can be lifted free from above the sink. Lift it straight up - the inlet tubes will thread through the holes in the sink deck. If it feels stuck, check that both nuts are fully removed and that no other fastener is holding the base down.
With the old faucet removed, you will likely find a ring of old plumber's putty or silicone residue on the sink deck around the faucet holes. This must be fully removed before the new faucet is installed - installing over old residue prevents the new base from sitting flat and sealing correctly, which leads to water seeping under the faucet base and eventually into the cabinet below.
Use a plastic putty knife to lift and peel old plumber's putty - it typically comes away in strips once the edge is lifted. For silicone residue, allow a silicone remover spray (available at any Canadian hardware store) to soften it for five minutes, then scrape and wipe clean. Finish with a damp cloth and allow the sink deck to dry fully before installing the new faucet.
While the sink deck is clear, also clean around and inside the drain hole. If you are replacing the drain assembly at the same time as the faucet, now is the time to remove the old drain body - unscrew the locknut from below the sink with channel-lock pliers, then lift the drain body out from above. Clean the drain hole before installing the new drain.

Before setting the new faucet in place, check the manufacturer's instructions to determine which sealing method is specified. Most faucets include either a rubber or plastic deck gasket (in which case no putty is needed - the gasket creates the seal), or they specify plumber's putty around the faucet base, or silicone for stone, composite, or engineered surfaces.
If the faucet uses a deck gasket: peel the paper backing if present and press it against the underside of the faucet base. No additional sealant required on standard ceramic or porcelain sinks. If you are installing on a stone or natural surface, apply a thin bead of silicone under the gasket for added security.
If applying plumber's putty: roll a rope of putty approximately 1cm in diameter and press it around the perimeter of the faucet base underside. Do not use plumber's putty on natural stone, composite resin, or fireclay sinks - use clear silicone sealant only on these materials, as putty will stain them.
From above the sink, thread the faucet inlet tubes and any included mounting hardware through the faucet hole(s). Press the faucet base firmly and evenly onto the sink deck. Any excess putty that squeezes out from the edges is normal - it will be trimmed after the faucet is secured.
Return under the sink with your basin wrench and headlamp. Thread the mounting nuts onto the faucet inlet tubes by hand first - do not use a wrench until they are hand-tight, as cross-threading a plastic nut on the first few turns will require removing the faucet to start again.
Once hand-tight, switch the basin wrench jaw to the clockwise direction and tighten each mounting nut firmly. The target is snug-firm - the faucet base should not be able to rotate on the sink deck when you try to turn it from above. Do not overtighten: plastic mounting nuts on modern faucets crack under excessive torque, and overtightening on a ceramic sink can crack the deck around the holes. Firm hand-tight with the basin wrench is the correct torque.
Once the faucet is secured, return to the top of the sink and trim any plumber's putty that has squeezed out from under the base edges, using your putty knife held flat against the sink surface. Wipe the area clean with a damp cloth.
If your new faucet includes a drain assembly (most do), install it now. Apply plumber's putty around the top flange of the drain body - the decorative ring that will be visible on the sink surface. Insert the drain body through the drain hole from above. From below the sink, slide the rubber gasket, friction ring, and locknut onto the drain body in the order specified in the instructions, and tighten the locknut by hand and then with channel-lock pliers until the drain body does not rotate. Do not over-tighten - the locknut is plastic on most modern drains and will crack.
Install the pivot rod: insert it into the horizontal port on the drain body. You will feel it click into a slot inside the drain stopper. The stopper should lift and lower smoothly as the pivot rod moves in and out. Slide the clevis strap over the pivot rod and secure it with the spring clip at the hole that allows the stopper to open fully when the lift rod is up.
Thread the lift rod down through the hole in the back of the faucet body and clip it to the top of the clevis strap. Test the stopper action from above - lifting the rod should raise the stopper and seal the drain; pushing down should lower and open it. Adjust the clevis strap clip position to fine-tune the action.
Connect the new braided supply lines between the faucet inlet tubes and the shut-off valves. Hot water connects to the left inlet (typically marked H or red) and cold to the right (C or blue) - confirm with the faucet's installation instructions as some designs reverse this.
Wrap two to three layers of plumber's tape (PTFE/Teflon tape) clockwise around any male threaded connections before attaching the supply line nuts. This prevents slow thread-joint drips, which are the most common source of post-installation leaks. Thread the supply line nuts onto the faucet inlets by hand first, then tighten with your adjustable wrench - one-quarter turn past hand-tight is the correct torque on brass fittings. Over-tightening can crack the supply line fitting or strip the inlet tube threads.
At the shut-off valve end, connect the supply lines to the valve outlet in the same way - PTFE tape on male threads, hand-tight then one-quarter turn with a wrench. Hold the valve body steady with your other hand as you tighten to prevent torquing the valve off the wall supply line.

Before turning on the water supply, make sure the faucet handle is in the OFF position. Turn the shut-off valves back on slowly - counter-clockwise, opening the cold valve first. Allow the pressure to build over 10-15 seconds rather than opening the valves all the way at once. Listen for any sounds of water flowing while the faucet is closed - this indicates a leak somewhere in the supply line connections that needs immediate attention before opening the valves fully.
Once both valves are fully open, turn on the faucet and allow the water to run for 30 seconds. Run both hot and cold separately to confirm both supply lines are functioning. Then close the faucet and stay under the sink for two full minutes, watching every connection point - both supply line connections at the faucet inlets, both supply line connections at the shut-off valves, and the drain body locknut - for any sign of dripping or weeping.
If all connections are dry after two minutes, run the faucet again for one minute on full pressure and repeat the leak inspection. If any connection shows moisture, tighten it one-quarter turn further and re-inspect. If a connection continues to drip after tightening, shut off the water, disconnect the fitting, re-apply PTFE tape, and reconnect. Do not leave a dripping connection and assume it will seal itself over time - it will not.
- Supply line connection at faucet hot inlet - dry
- Supply line connection at faucet cold inlet - dry
- Supply line connection at hot shut-off valve - dry
- Supply line connection at cold shut-off valve - dry
- Drain body locknut area - dry, no weeping
- Faucet base-to-sink deck seal - no water seeping under base
- Drain stopper action - fully seals when rod is up, fully opens when rod is down
- Hot and cold sides confirmed - hot water from left side of faucet, cold from right
A widespread faucet - where the spout and two handles are three separate units that mount independently into three separate holes - follows the same overall process as a centerset, but with additional complexity under the sink. Each of the three components has its own mounting nut, and the spout is connected to the two handle valves by a pair of flexible supply tubes that run under the sink deck between the components. These tubes must be connected correctly before the supply lines from the shut-off valves are attached.
The additional steps for a widespread faucet: after mounting all three components with their individual mounting nuts, connect the flexible cross-tubes between the handle valve outlets and the spout inlet ports (following the manufacturer's routing diagram - these vary by product). Then connect the shut-off valve supply lines to the handle valve inlets as you would for a centerset. The leak test is more thorough for a widespread installation because there are more connection points - the two cross-tube connections at each handle valve, the two cross-tube connections at the spout base, and the two supply line connections at the shut-off valves, for a total of six connection points to inspect rather than the standard two.
| Situation | Why It Matters | DIY or Pro? |
|---|---|---|
| Shut-off valves seized or corroded | Forcing a seized valve can break it off the supply pipe - an immediate flooding emergency requiring a main water shut-off | Call a Plumber |
| Old supply lines are rigid chrome pipe (no flexible connector) | Requires cutting the rigid pipe and installing a new valve with a flexible connector - a separate job from the faucet replacement | Call a Plumber |
| Evidence of water damage or mould under the vanity | Indicates a previous leak that may have damaged the cabinet, subfloor, or wall - needs professional assessment before proceeding | Call a Plumber |
| Faucet hole configuration does not match new faucet | Adding or relocating holes in a ceramic or stone sink requires a diamond-tipped hole saw and specific technique - achievable DIY but risky without prior experience | Experienced DIY or Pro |
| Mounting nuts will not release after penetrating oil | Impact tools may be required - forcing with hand tools risks cracking the sink deck | Experienced DIY or Pro |
| Standard faucet replacement - functional shut-off valves and flexible supply lines | The standard scenario this guide covers - no professional plumbing knowledge required | DIY |
| Replacing supply lines at the same time as the faucet | Straightforward - unscrew old lines, screw on new braided lines, PTFE tape on threads | DIY |
| Replacing drain assembly at the same time as the faucet | Included in this guide - no special tools required beyond channel-lock pliers | DIY |
- Faucet hole count, diameter, and hole spacing confirmed - new faucet matches the sink configuration
- Basin wrench in hand before the job begins - not being sourced mid-job
- New braided supply lines purchased - correct length for your vanity
- Penetrating oil, plumber's tape, and plumber's putty or silicone confirmed for the sink material
- Old towels and small bucket placed in cabinet before any connections are touched
- Cabinet under sink emptied completely
- Both shut-off valves closed fully - water stopped at the faucet above
- Supply lines disconnected at both ends - residual water drained into bucket
- Drain pop-up linkage disconnected - pivot rod, clevis strap, and lift rod removed
- Faucet mounting nuts removed with basin wrench - faucet lifted free from above
- Sink deck cleaned of all old putty, silicone, and residue - surface dry and flat
- Correct sealant method confirmed for sink material - putty, gasket, or silicone as specified
- New faucet seated evenly on sink deck - base not rocking or uneven
- Mounting nuts threaded by hand before using basin wrench - no cross-threading
- Mounting nuts firm-tight - faucet does not rotate when turned from above
- Drain assembly installed - locknut tight, drain body does not rotate
- Pop-up linkage connected and tested from above - stopper seals fully, opens fully
- PTFE tape applied to all male threaded connections before supply lines are attached
- Supply lines connected - hot left, cold right - both hand-tight then one-quarter turn with wrench
- Faucet handle in OFF position before opening shut-off valves
- Cold shut-off valve opened slowly first - no sounds of flowing water with faucet off
- Hot shut-off valve opened - both valves fully open
- Faucet run for 30 seconds - both hot and cold sides tested separately
- All six connection points inspected for drips - supply line nuts at faucet inlets and at shut-off valves, drain locknut
- Faucet base-to-sink deck seal inspected - no water seeping under the faucet base
- Any weeping connections tightened one-quarter turn and re-inspected
- All connection points confirmed dry - job complete
Shop bathroom faucets at Bathify - shipped across Canada
Browse single-hole, centerset, and widespread bathroom faucets in matte black, brushed nickel, brushed gold, and polished chrome - all shipped free on orders over $50.


