






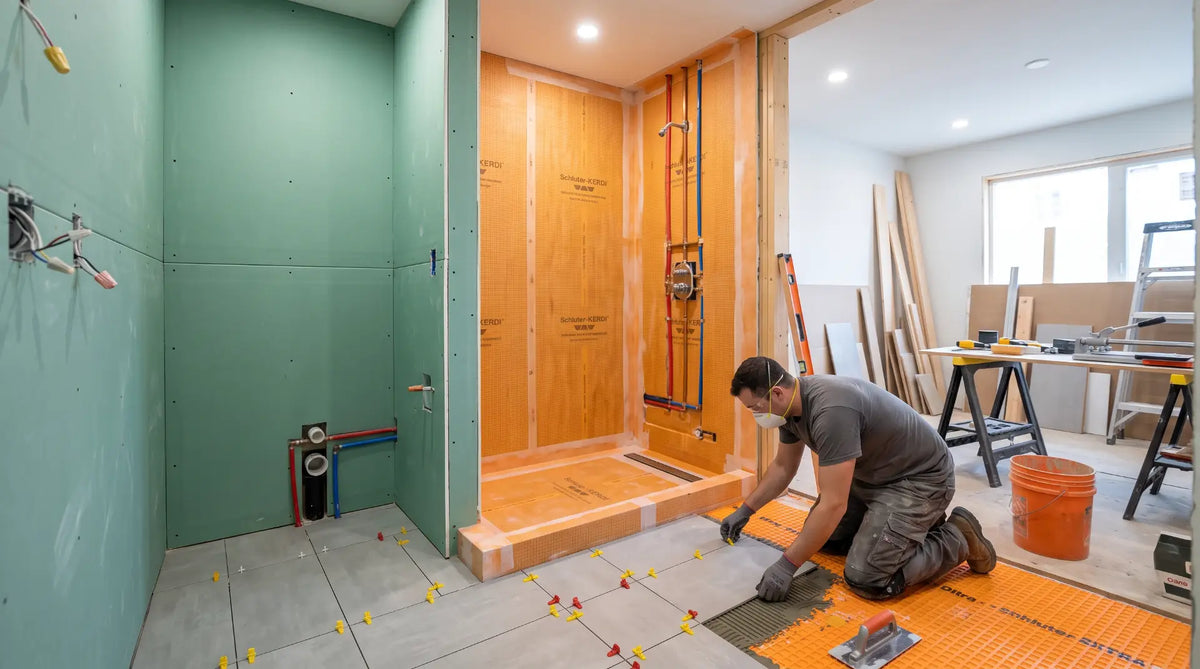
Every trade in a bathroom renovation is building on top of the trade before it. Tile before waterproofing, fixtures before cured grout, or drywall before a rough inspection - and something finished has to come out again. This is the correct order of work, why each stage depends on the one before it, and the reordering mistakes that cost Canadian homeowners the most.
The correct bathroom renovation order of work is: select and order all materials, demolition, rough-in plumbing, rough-in electrical, rough inspection, insulation and wall board, waterproofing, tile installation, paint, fixture and vanity installation, faucets and accessories, then final inspection. Each stage exists to make the next one possible - plumbing and electrical must be open and inspected before walls close, waterproofing must be complete before tile goes up, and tile must be fully cured before anything is bolted to it. Reordering any of these steps is the single most common source of rework, delay, and cost overrun in a Canadian bathroom renovation.
This guide covers the logic of the sequence - what depends on what, and what breaks when the order changes. If you're after how long each stage actually takes and a week-by-week schedule, our companion bathroom renovation timeline guide covers the duration side of the same twelve stages in full.
Sequence, budget, and timeline are three views of the same project. Pair this guide with our bathroom remodel cost breakdown to know what each stage costs, and our renovation timeline guide to know how long each one takes. This page answers the question those two don't: what order does it all have to happen in, and why.
This is the full sequence for a mid-range to full gut bathroom renovation in Canada. A cosmetic refresh with no plumbing, electrical, or tile changes can skip most of the middle stages - but the order among the stages that do apply doesn't change.
| # | Stage | What must be true before it starts | Permit checkpoint |
|---|---|---|---|
| 1 | Select & order materials | Layout and scope finalised | - |
| 2 | Demolition | Materials ordered, water/power shut off to the room | - |
| 3 | Rough-in plumbing | Demolition complete, existing conditions assessed | - |
| 4 | Rough-in electrical | Walls open, plumbing rough-in located | - |
| 5 | Rough inspection | Plumbing & electrical rough-in fully complete | Required |
| 6 | Insulation & wall board | Rough inspection passed | - |
| 7 | Waterproofing | Wall board installed in all wet zones | - |
| 8 | Tile installation & cure | Waterproofing cured (24-48 hrs) | - |
| 9 | Paint | Tile substantially complete | - |
| 10 | Fixtures & vanity | Grout cured (72 hrs minimum) | - |
| 11 | Faucets, mirror & accessories | Vanity & toilet set | - |
| 12 | Final inspection | All fixtures connected & functional | Required |
Permit and inspection requirements vary by municipality. Confirm with your local building department before demolition - our complete renovation guide covers permit basics in more depth.

A bathroom renovation isn't a list of tasks that can be done in any sequence and still add up to the same result - it's a chain of dependencies where each stage physically requires the one before it to be finished. Plumbing and electrical rough-in has to happen while the walls are open, because doing it after the walls close means cutting them open again. Waterproofing has to happen before tile because a membrane applied over grout lines doesn't seal anything. Fixtures go in after tile because a toilet or vanity in the way is an obstacle the tile setter has to work around badly, or move.
The financial consequence of ignoring this logic is always the same shape: work that was finished has to be partially or fully undone to correct something that should have happened earlier. A wall that's been tiled and grouted has to be demolished again to fix a plumbing rough-in that wasn't inspected. A vanity that's already installed has to come back out because the floor tile under it was never finished. Every one of these situations costs more than doing the step in the right order the first time - not because the second attempt is harder, but because the first attempt's material and labour are now sunk cost, wasted rather than built upon.
Each stage has one or two decisions that determine whether the next stage can start on schedule. These are the ones that matter most.

Every fixture, tile, and finish should be selected, ordered, and confirmed in stock before a single wall is opened. A contractor who starts demolition while the vanity is still being decided is building toward a stalled site.
- Confirm stock or lead time on every item before booking a start date
- Order the longest lead-time item first - it sets the schedule

This is where hidden conditions - rot, mould, outdated wiring, asbestos in pre-1985 homes - surface. Everything discovered here can change the plumbing and electrical scope that follows.
- Inspect subfloor and framing before rough-in begins
- Flag any discovery that could shift the budget immediately

Supply lines, drain relocation, and all wiring must be finalised here. Any layout decision not locked in by this point - a moved drain, an added outlet - becomes far more expensive once walls close.
- Confirm fixture rough-in dimensions against actual product specs
- Pressure-test plumbing connections before inspection is booked

An inspector must verify plumbing and electrical rough-in before drywall or backer board covers it. Closing walls before this inspection - even to "save time" - is a code violation in every Canadian province.
- Book the inspection as soon as rough-in is substantially complete
- Budget a few days' wait for scheduling, longer in peak season

A waterproofing membrane must cover every shower surface - floor, walls to full tile height, and inside any niche - before tile touches it. A gap here is invisible until it fails years later behind finished tile.
- Use a certified membrane system, applied by an experienced installer
- Observe the full membrane cure time before tile starts

Thinset needs 24-48 hours before grouting; grout needs a minimum of 72 hours before water exposure. These are chemistry timelines, not scheduling preferences, and nothing after this stage should start before they're met.
- Confirm cure times in writing with your tile setter before work begins
- Do not use the shower or set fixtures before grout has fully cured

Painting after tile but before fixtures means the painter isn't working around a finished vanity or toilet, and any splatter is easy cleanup on tile rather than a new fixture.
- Use moisture-resistant paint rated for bathroom humidity
- Mask tile edges and any completed trim before rolling

The vanity, toilet, faucets, mirror, and accessories go in roughly this order, with the plumber and electrician each returning for a second, shorter visit to make final connections.
- Inspect every delivered fixture for damage immediately on arrival
- Caulk all tile-to-fixture transitions as the very last physical step
Almost every expensive bathroom renovation mistake in Canada traces back to a step happening out of order. These are the ones that come up most often.
| Mistake | Why it happens | What it costs |
|---|---|---|
| Closing walls before rough inspection | Contractor or DIYer tries to "save a day" waiting on inspector scheduling | Wall must be reopened for inspection - full rework of wall board and any tile started |
| Tiling before plumbing/electrical rough-in is fully finalised | Homeowner changes a fixture location after tile has started | Finished tile cut open to access plumbing or wiring underneath |
| Setting fixtures before grout has cured 72 hours | Eagerness to use the bathroom or a tight handover deadline | Porous, discoloured, or cracked grout - a multi-day, costly replacement |
| Ordering the vanity after demolition has started | Design decision deferred, assumed there's time to decide later | Site sits idle for days or weeks waiting on a 4-8 week lead time item |
| Painting before tile is complete | Painter scheduled early to "get ahead" of the tile setter | Paint damaged by tile work, requiring a second full paint pass |
| Skipping the final inspection | Assumed unnecessary once the bathroom looks finished | Open permit surfaces at resale - delays closing and raises buyer questions |
Lock every design decision - tile, fixtures, finishes, hardware - before demolition starts. A change made mid-sequence doesn't just cost the price difference of the new item; it costs whatever stage has to be undone to accommodate it. See our guide to bathroom renovation cost for how these overruns typically add up.
Sequence Is the Plan
A bathroom renovation budget and a bathroom renovation timeline both assume the twelve stages happen in order. Skip that assumption and both numbers become unreliable - not because the trades did bad work, but because work done out of sequence has to be partly undone to let the next stage happen correctly. The order above isn't a preference; it's the dependency chain every Canadian bathroom renovation runs on, from a powder room refresh to a full gut.
Order your vanity, fixtures, and finishes from Bathify's vanity collection and faucet collection before demolition starts, so stage one is genuinely finished before stage two begins.
Ready to Order Ahead of Demo Day? Shop Bathify Canada
Vanities, faucets, shower systems, toilets, and mirrors - all in stock and shipped across Canada, so stage one of your renovation is genuinely finished before demolition starts. Free ground shipping on orders over $50.


