






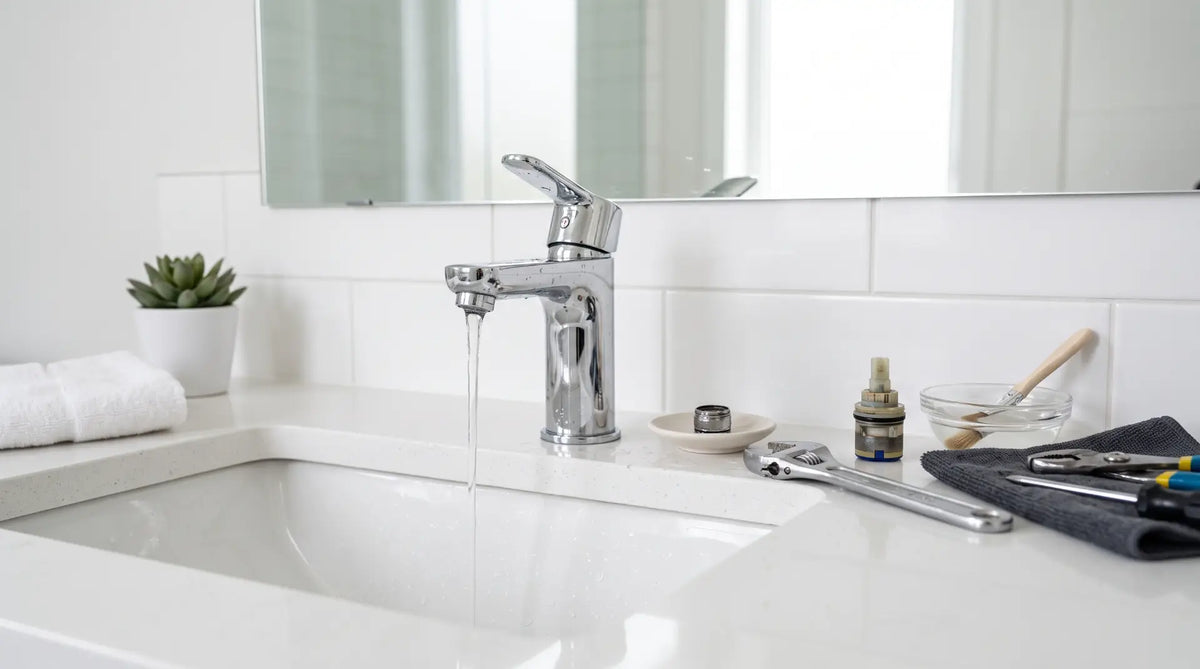
A trickle where there used to be a strong stream almost never means the faucet is dying - it usually means something inside it is blocked. This guide walks through the exact diagnostic order a plumber would use: aerator, valves, cartridge, supply lines, and the whole-house checks, so you can find the real cause in under an hour without a service call.

Weak flow at a bathroom faucet is one of the most common plumbing complaints in Canadian homes, and it's also one of the most over-diagnosed. Homeowners see a trickle, assume the faucet has failed, and either live with it for months or replace a perfectly good fixture. In reality, the vast majority of low-pressure complaints trace back to something small and fixable: a mineral-clogged aerator, a shut-off valve that got bumped or never fully reopened after other work, or sediment sitting inside the cartridge. None of these require a new faucet.
The trick is working through the causes in the right order, starting with the cheapest and most likely fix before moving to anything that involves parts or tools. This guide follows that order. If you've already confirmed the faucet is beyond saving, our guide on how to install a bathroom faucet without a plumber covers the full swap, and our best bathroom faucets in Canada guide can help you pick the replacement.
Work through the five diagnostic steps in order - each one rules a cause in or out before you move to the next. Most people find and fix the problem at Step 2. Jump to the symptom-to-cause table if you already know something specific, like hot-only pressure loss or a faucet that's always been weak since a new install.
A plumber troubleshoots low pressure in a fixed sequence - cheapest and most common cause first. Following the same order saves you from taking a faucet apart before you've ruled out a two-minute fix.
Test other fixtures before touching anything. This single check tells you whether you're solving a faucet problem or a house-wide plumbing problem.
Mineral scale in the aerator screen accounts for the majority of Canadian low-pressure complaints, especially in hard-water regions.
A shut-off valve that isn't fully open - often after other work under the sink - is a common and completely free fix.
If the aerator was clean, the blockage is usually further upstream in the cartridge or the flexible supply lines feeding the faucet.
Rule out a failing pressure-reducing valve, a water softener issue, or a faucet old enough that replacement makes more sense than repeated repair.
Before you take anything apart, spend two minutes testing the rest of the house. Turn on the kitchen faucet, the tub or shower, and if you have a second bathroom, that sink too. If everything else has normal pressure and only this one faucet is weak, the problem is local to that fixture and Steps 2-4 below will almost certainly solve it.
If every fixture in the house is weak, skip ahead to Step 5 - you're dealing with a house-wide issue, not a faucet issue, and cleaning this one aerator won't fix it.
The aerator is the small mesh screen screwed into the very tip of the faucet spout. It mixes air into the water stream and, as a side effect, it's also the first place mineral scale, sediment, and small debris collect - which makes it the single most common cause of low pressure at a bathroom faucet across Canada, particularly in hard-water areas of Ontario, the Prairies, and interior BC.
Unscrew the aerator counter-clockwise by hand. If it's seized from mineral buildup, wrap it in a cloth or piece of tape and use pliers to avoid scratching the finish. Take the aerator apart - most twist or pop apart into two or three pieces - and soak all the parts in white vinegar for 30 to 60 minutes to dissolve the scale. Scrub the mesh screen with an old toothbrush, rinse thoroughly, and use a pin to clear any debris still lodged in the mesh holes. Reassemble in the same order you took it apart and screw it back onto the spout.
Run the tap before reinstalling the aerator - if pressure is strong with the aerator off, you've confirmed the aerator was the cause and the clean will fix it. If pressure is still weak with the aerator removed, the blockage is further upstream and you'll need Step 3 or Step 4.
Heavily scaled aerators that won't come clean, or ones with a stripped or corroded thread, are inexpensive to replace outright rather than repeatedly cleaning. Most hardware stores carry universal replacements, and it's worth keeping a spare on hand if your home has hard water.
If the aerator was clean or cleaning it didn't help, look under the sink at the two shut-off valves feeding the faucet's hot and cold supply lines. These are commonly bumped, partially closed during other work, or simply never fully reopened after a previous repair - and a valve that's only open a quarter turn will noticeably restrict flow without cutting it off completely, which makes it easy to miss.
Turn both valves fully counter-clockwise (open) by hand. If a valve feels stiff, corroded, or won't turn, don't force it - a seized shut-off valve can snap under pressure, and this is one of the few points in this guide where calling a plumber is the right call rather than pushing through it.
If the aerator was clean and the valves were fully open, the remaining likely causes are inside the faucet body or in the flexible supply lines feeding it.
With the shut-off valves closed, disconnect the supply lines from the faucet (not from the valve) and, one at a time, briefly open each valve into a bucket. This flushes out any loose sediment before it has a chance to re-clog a freshly cleaned aerator. Reconnect the lines and turn the water back on slowly.
If flow is still weak, the cartridge itself - the internal valve that controls hot and cold mixing - may be scaled up or partially clogged. Turn off the water, remove the faucet handle (usually a single set screw hidden under a decorative cap), and lift out the cartridge according to the manufacturer's instructions. Rinse it under running water and check for visible scale or debris in the inlet ports. A cartridge that's cracked, pitted, or won't seat properly should be replaced rather than cleaned - most major faucet brands sell cartridges as a standalone replacement part matched to that specific model.
If you've worked through Steps 1-4 and pressure is still weak, or if Step 1 showed the problem affects every fixture in the house, the cause has moved outside the faucet itself.
Whole-house low pressure is most often caused by a partially closed main shut-off valve, a failing pressure-reducing valve (PRV) if your home has one, a clogged whole-home sediment filter, or - in homes on a water softener - a softener that isn't regenerating properly and is restricting flow. These are typically jobs for a licensed plumber, since they involve the main supply line rather than a single fixture.
Faucet age matters too. A cartridge that has scaled up once will scale up again faster the second time, and a faucet in the 10-15+ year range has often reached the point where the labour cost of a second or third repair starts to approach the cost of a new fixture. See When to Repair vs Replace below.
Match what you're seeing to the most likely cause and jump straight to the relevant fix.
| Symptom | Most Likely Cause | Fix |
|---|---|---|
| Weak flow, both hot & cold, only this faucet | Clogged aerator | Clean or replace aerator (Step 2) |
| Weak flow started after other under-sink work | Partially closed shut-off valve | Fully open both valves (Step 3) |
| Weak flow, one side only (hot or cold) | Sediment in that supply line or cartridge inlet | Flush that line, inspect cartridge (Step 4) |
| Weak flow at every fixture in the house | Main valve, PRV, or softener issue | Whole-house check, call a plumber (Step 5) |
| Weak flow plus dripping or handle feels loose | Worn or failing cartridge | Replace cartridge (Step 4) or the faucet |
| Weak flow right after a brand-new faucet install | Installation debris in the aerator | Remove and clean aerator (Step 2) |
This points to a problem on that specific supply line rather than the faucet as a whole. Confirm the corresponding shut-off valve is fully open first, then flush that line. If it's the hot side specifically and it's weak throughout the house (not just this faucet), a partially closed valve at the water heater or a heavily sedimented hot water tank can also restrict flow - worth checking if you haven't flushed your water heater tank recently.
This is almost always installation debris - bits of PTFE tape, solder, or sediment loosened while the supply lines were disconnected - lodged in the aerator screen. It's rarely a defect in the faucet itself. Remove and clean the aerator per Step 2 before assuming the product is faulty. If you're mid-installation, our DIY faucet installation guide covers the full process, including flushing lines before final connection to prevent exactly this.
Well systems add two extra possibilities: a failing well pump losing prime or pressure, or a clogged sediment or iron filter if your system has one. If municipal-supply troubleshooting steps above don't resolve it and you're on a well, a well or water treatment technician - rather than a plumber - is usually the right call.
A softener with a fouled resin bed or a stuck bypass valve can restrict flow to the entire house. Check whether the softener's bypass valve is fully open, and confirm the unit is regenerating on schedule. This is a whole-house cause, not a single-faucet one.
Most low-pressure problems are cheap, quick fixes - but not always. Here's how to decide whether to keep repairing or start shopping.
If replacement is the better call, our best bathroom faucets in Canada pillar guide breaks down top brands and price tiers, and this brand comparison can help you choose a faucet built to avoid a repeat of the same problem. Reputable brands like Riobel and Kraus use brass bodies and ceramic disc cartridges that resist the scale buildup that causes most of the issues covered above.
Everything covered in this guide is within reach of a homeowner with basic tools and about an hour. Call a licensed plumber instead if you run into any of the following:
Universal aerators and basic supply lines are widely available at any Canadian hardware store. Cartridges are brand-specific, so match the exact model rather than guessing. If the diagnosis lands on the faucet itself, Bathify carries a full range of CSA-certified sink faucets from Riobel, Kraus, and other trusted brands, including sink faucets and wall-mount faucets for tighter vanity layouts. Our widespread vs centerset faucet guide can help confirm you're ordering the right configuration for your existing sink holes before you buy.
Start With the Aerator - It Solves Most of These
Low water pressure at a single bathroom faucet is rarely a sign the faucet has failed. Work through the diagnostic order in this guide - aerator, valves, cartridge and supply lines, then whole-house causes - and you'll find and fix the real cause in most cases without spending a dollar or calling a plumber. Only when you've ruled out all of the above, or when the faucet is old enough that repeated repair no longer makes financial sense, is it time to shop for a replacement.
Ready to Replace It Instead? Shop Bathify Canada
Sink faucets, wall-mount faucets, and full bath collections - from Riobel, Kube Bath, Vanity Art, Mylo, Agua Canada, and more. Free ground shipping on orders over $50. Delivered across Canada.


