






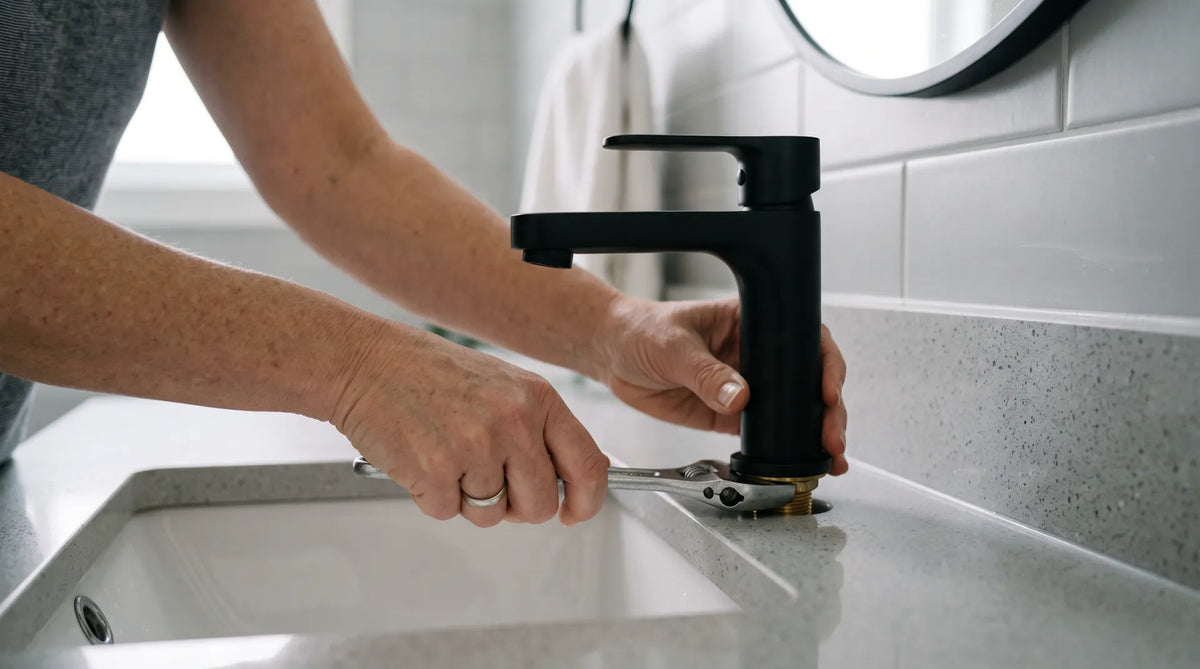
A bathroom faucet swap is one of the most beginner-friendly plumbing jobs in the house - no permit in most cases, no special licence, and about an hour with tools you likely already own. Here's the exact sequence, the parts you need, and the mistakes that turn an easy job into a callback.
For a straightforward like-for-like swap - your new faucet fits the same holes and connects to the same hot and cold supply lines already under your sink - yes. This is one of the most approachable plumbing jobs in a Canadian home: no gas, no electrical, no wall demolition, and no wet trades to sequence around. It's also one of the most commonly overpaid-for. Homeowners routinely book a $150-$400 CAD plumber visit for a job that takes an hour with an adjustable wrench, a bucket, and a bit of patience.
The catch is that "faucet installation" covers a range of difficulty. Swapping a single-hole faucet for another single-hole faucet on a vanity with healthy, easy-to-turn shut-off valves is genuinely easy. Installing a wall-mount faucet, dealing with seized or missing shut-offs, or changing your hole configuration entirely are different jobs with different risk levels - and this guide flags exactly where that line sits, so you can decide with your eyes open rather than find out halfway through.
If you haven't chosen your replacement faucet yet, start with our full guide to the best bathroom faucets in Canada - it covers finishes, brands, and price tiers before you get to installation.
Canadian plumbing is governed by the National Plumbing Code of Canada, adopted provincially with local amendments, and enforced at the municipal level. Permits exist to catch work that changes how a building's plumbing system is laid out - moving a drain, adding a fixture, altering rough-in piping. A fixture replacement, where a faucet is removed and an equivalent faucet goes back in the same spot using the same supply lines, is routine maintenance in almost every Canadian jurisdiction and does not trigger a permit.
Where it gets provincial is licensing for anything beyond that. Most provinces allow a homeowner to do plumbing work on their own owner-occupied home without a licence, within limits. Quebec is the notable exception, with tighter self-builder rules under its construction licensing regime (the RBQ), so Quebec homeowners should confirm what's permitted before doing anything beyond swapping a fixture with existing connections.
One more Canada-specific point worth knowing before you shop: any plumbing fixture sold for use in Canada should carry cUPC or CSA certification, confirming it meets the National Plumbing Code's material and performance standards. It's worth a quick check on the box or spec sheet regardless of where you buy.
The single biggest cause of a return, a second trip to the store, or a botched install is buying a faucet that doesn't match your sink's hole count and spacing. Look under your existing faucet (or measure the holes in your countertop if the sink is empty) before you order anything.
| Type | Sink Holes | DIY Difficulty | Best For |
|---|---|---|---|
| Single-Hole | 1 hole | Easiest | Small vanities, powder rooms, most contemporary faucets |
| Centerset | 3 holes, 4" fixed spread | Easy - Moderate | Standard vanities where both handles sit on one base |
| Widespread | 3 holes, 8"-16" spread | Moderate | Larger vanities; more connections, more time, not more skill |
| Wall-Mount | No deck holes - mounted in the wall | Advanced | Vessel sinks and floating vanities; usually needs an in-wall rough-in valve |
If you're not sure which configuration you have, our dedicated widespread vs centerset faucet guide walks through exactly how to measure your sink so you order the right thing the first time. This how-to covers single-hole, centerset, and widespread installs - all deck-mounted and all within reach of a confident DIYer. Wall-mount faucets involve a valve body set inside the wall before drywall and tile go up, which is a rough-in job best paired with other bathroom work rather than a same-day swap; see the collection below if that's your project.
Gather everything before you shut off the water - you don't want to be dripping under the sink halfway to the hardware store.
| Item | Why You Need It |
|---|---|
| Adjustable wrench & basin wrench | A basin wrench reaches the cramped space behind the sink where a standard wrench can't swing |
| Bucket & old towels | Catches the residual water that sits in the lines even after the shut-offs are closed |
| New supply lines | Braided stainless steel lines are easiest to work with and least likely to kink; don't reuse old ones |
| PTFE (Teflon) tape | Wrap threaded connections that don't have a built-in washer |
| Plumber's putty or silicone sealant | Only if your faucet's install sheet calls for it - many current models seal with a gasket instead |
| Screwdriver set | For mounting brackets and coupling nuts on the new faucet |
| Flashlight or headlamp | The cabinet under a sink is dark exactly where you need to see clearly |
| Safety glasses | Protects your eyes working under the sink, especially loosening old, corroded nuts |
Bring your old faucet's mounting hardware to the store, or a photo of your sink's underside, if you're buying in person. Countertop thickness varies - quartz and marble decks sometimes need the longer mounting bolts included with premium faucets rather than the standard-length hardware.
Find the two angle stops under the sink - one for hot, one for cold - and turn each clockwise until it stops. Then open the faucet at the handle to release the pressure left in the lines and let any remaining water drain into a bucket. Plug the sink drain with a rag so small parts can't fall through.
Using the basin wrench, disconnect the supply lines from the faucet tailpieces first, then from the angle stops - keep the bucket underneath. If your faucet has a pop-up drain, disconnect the pivot rod linkage below the sink before you lift anything out. Remove the mounting nuts holding the faucet to the deck, then lift the old faucet up and out.
With the faucet out, clean the deck thoroughly. Old plumber's putty, mineral scale, and grime left behind will stop a new gasket from sealing properly, so scrape and wipe the area down to bare, dry countertop before you continue.
Before you commit, dry-fit the new faucet: confirm it sits flush in the hole(s), that the mounting bolts reach through your specific countertop thickness, and that a widespread faucet's handles line up comfortably with the spout. This is the moment to catch a mismatch, while everything is still dry and nothing is sealed.
Follow the manufacturer's install sheet for your specific model - the sequence varies slightly by brand, but the principle is consistent: seat the gasket or apply putty/silicone exactly as specified, lower the faucet body into the hole(s), and from underneath the sink, thread on the mounting washers and nuts by hand first. Hand-tighten evenly on all sides before you reach for a wrench.
Snug the mounting nuts with the wrench until the faucet is stable and doesn't rock - then stop. Overtightening is the most common installation mistake: it can crack a porcelain or fireclay sink, or compress a gasket unevenly enough to create a slow weep leak that shows up days later. If you have a separate pop-up drain assembly, install it now and reconnect the pivot rod so the stopper moves freely.
Attach your new braided supply lines to the faucet's hot and cold tailpieces, then to the angle stops. Wrap threaded ends in PTFE tape if the connection doesn't already have a built-in rubber washer, and hand-tighten before giving each connection a final quarter-turn with the wrench - snug, not forced. Double-check you haven't crossed hot and cold; it's an easy mix-up and an annoying one to discover after everything's buttoned up.
Open both angle stops slowly and watch every connection - faucet tailpieces, supply line ends, and the angle stops themselves - for drips. Run the hot side, then the cold side, for a full minute each, checking the aerator flows evenly. Leave the cabinet doors open and check again after ten minutes, and once more the next morning; a marginal seal often takes a little time and pressure cycling to reveal itself.
- Overtightening mounting nuts - cracks porcelain decks and warps gaskets, causing a slow leak rather than a clean seal.
- Skipping the deck-thickness check - mounting bolts too short for a thick quartz or stone countertop won't grip properly, no matter how hard you tighten.
- Reusing old supply lines - rubber washers degrade over time; a few dollars on new braided lines is cheap insurance against a cabinet full of water.
- Not draining the lines fully - residual water under pressure can spray when you disconnect the first fitting if you skip releasing pressure at the handle first.
- Forcing a seized angle stop - this is how a one-hour job becomes an emergency shut-off-the-main situation.
- Testing once and walking away - many leaks are slow weeps that only show up after ten minutes of water pressure, not the first thirty seconds.
Swapping just the faucet sometimes leaves you with a new finish that doesn't quite match your existing towel bar, drain, or cabinet hardware. Our guide to matching vs mixing bathroom hardware finishes covers when that's a problem worth fixing and when a deliberate mix actually looks better.
This job is designed to be doable, not to be done at all costs. Call a licensed plumber if any of the following apply:
- Your angle stops are seized, missing, or you're not confident shutting off the water without them.
- You're installing a wall-mount faucet that requires a new rough-in valve inside the wall.
- The project involves moving supply lines, changing pipe material, or altering anything beyond the fixture itself - this is where permit and licensing rules start to apply in most provinces.
- You open the cabinet and find soft, discoloured wood, active corrosion, or a musty smell - signs of a pre-existing leak that needs diagnosis before a new faucet goes anywhere near it.
- You're in Quebec and unsure whether your specific project falls within homeowner self-builder rules.
None of these are a failure - they're the difference between a fixture swap and a plumbing repair, and it's a genuinely useful distinction to make honestly before you start rather than midway through.
Buy your new faucet before you shut off the water, not after - you don't want your only working sink out of commission while you wait on shipping. Bathify carries faucets across the full range covered in this guide, from Riobel, Kube Bath, Agua Canada, Delta, TOTO, and more, with free ground shipping on orders over $50 across Canada.
Not sure which brand fits your budget and finish preference? Our Riobel vs TOTO vs Moen comparison and our wider honest comparison of plumbing fixture brands in Canada both go deeper than a spec sheet - design quality, durability, warranty coverage, and where each brand is actually worth the premium.
A Faucet Swap Is a Doable Afternoon - If Your Shut-Offs Cooperate
For most Canadian homeowners with a functioning pair of angle stops and a faucet that matches their existing sink holes, installing a bathroom faucet without a plumber is a realistic, low-risk DIY project - no permit required, and roughly an hour of work with tools you can buy for less than a single service call would cost.
The honest exception is anything that touches the fixed plumbing behind the wall: seized shut-offs, wall-mount rough-ins, or moved supply lines. Those aren't DIY failures to feel bad about - they're simply outside the scope of a fixture swap, and knowing the difference before you start is what keeps this an easy job instead of an expensive lesson.
Ready to Order? Shop Bathify Canada
Faucets, vanities, shower systems, tubs, toilets, and mirrors - from Riobel, Kube Bath, Vanity Art, Mylo, Agua Canada, and more. Free ground shipping on orders over $50. Delivered across Canada.


